Obsessed with Embellishment

Saturday, June 24, 2006


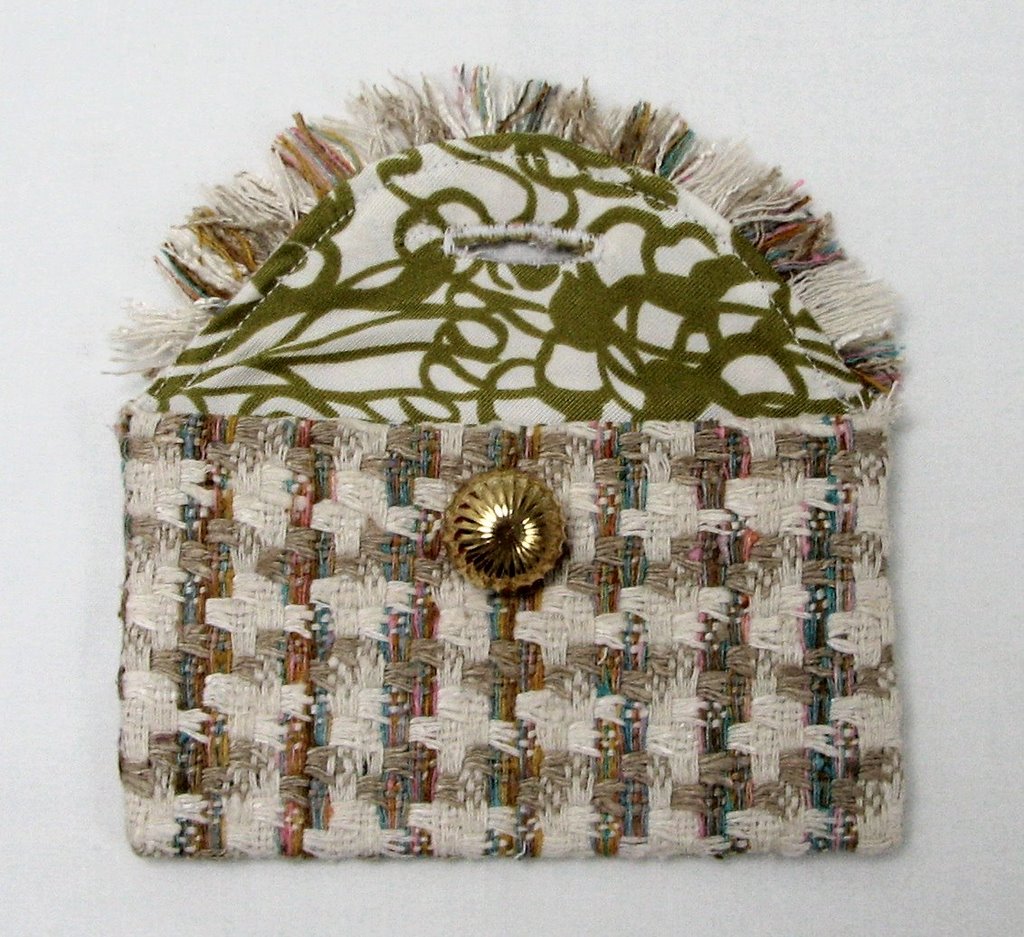
Here are some detail photos of the tiny bags I posted to the The Sewing Divas blog. The "Chanel" bag has a silk twill lining and the fringe is a strip of bias cut fabric stitched to the flap.

The Asian bag is made from a remnant of indigo dyed cotton. It has a silk twill lining that is s scrap from a vintage kimono. A wonderful littel company called Ah Kimono! They sell color cooredianted packs of authentic Japanese silks and cottons.

The folk art bag is made from wool felt and is embellished with machine embroidery. No lining is needed with wool felt but a stabilzer for the embroidery is still a good idea.

If you'd like a free PDF pattern & instuctions for this tiny bag, just email the Divas at thesewingdivas@hotmail.com and I'll send you a PDF of the pattern and instructions.

Sunday, June 04, 2006

Favorite Things


The Sewing Divas are no stranger to M&J Trimming, a fabulous one-stop NYC source for any kind of trim: bag handles and hardware, buckles, buttons, all types of Swarovski bling, as well as fashion and home dec trims of all kinds. M&J doesn't have the lowest prices in New York, but you can rely on them to have everything under one roof if you don't have a good trim resource in your town. They have a great website and the store is in a beautiful space right on 6th Avenue. Worth a trip just to drink it all in when you're in NYC.

And don't feel you need to be a sewer to check 'em out; their web site has a fun project center and also fashion trend projections.

Saturday, June 03, 2006

Simplicity 4124 - The Embellishment, Part II


The catch stitching secures the pressed back seam allowance at both the outer edge and the shoulder seams. The neckline seam is not folded back because that seam will be attached by machine.


The hardest thing about embellishment is getting started - and also knowing when to stop! After I finish up the beading I'll blog the rest of the construction process.

Simplicity 4124 - The Embellishment, Part I

The embellishment that I wanted to do on this pattern meant that the construction process had to be changed. The instructions say to stitch the placket to the front, and then attach the placket facing to the inside. I reversed this for a couple of reasons, (1) I wanted the placket edges to be crisp and even. It's just about impossible to get this with machine stitching, and (2) The placket had to be easy to handle so I could add the passementarie, rat tail cord and beading.

The first step was to create a placket template from a manila envelope (no seam allowances.) The template was used to form a clean edge. A piece of silk organza is placed underneath the fashion fabric and I pulled it up to fold back the seam allowance. The placket is interfaced to with a light knit fusible because it needs to be perfectly stable for the heavy embellishment. The interfacing goes to the edge on the neckline edge, but stops inside the seam allowance on the outside edge.


The next step is to catch stitch the fold backed seam allowance all along the outer edge of the placket. The black fabric is wool felt, which is needed as a backing. This is part of Kenneth's original technique. After the edges were catch stitched I lightly pressed and steamed the placket again, and then added the passementarie trim and rat tail cord.